Like what you see? Please share with your friends and the whole world...


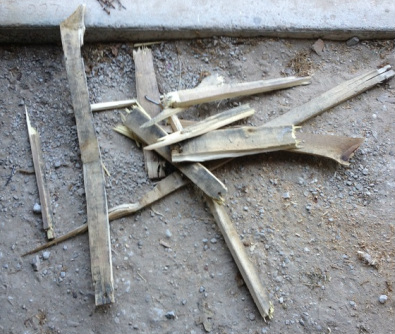
Maybe you’ve seen a pallet project on Pintrest, or maybe you’ve come across one on a blog, or maybe even a pallet table or vertical garden on this blog. And then you tried making your own project and you were sorely disappointed when trying to disassemble the pallet. You might have even ended up with something like this….
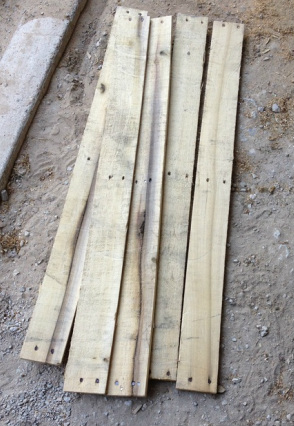
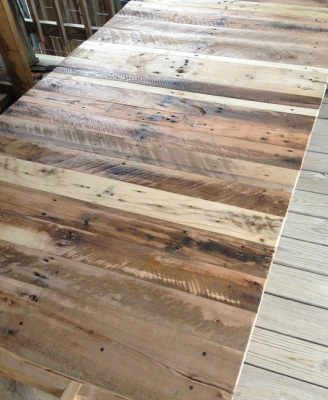
To help you combat these frustrations and get productive pieces of pallet wood like this…..
Let me give you a few pointers on using pallets and disassembling pallets.
Tip One:
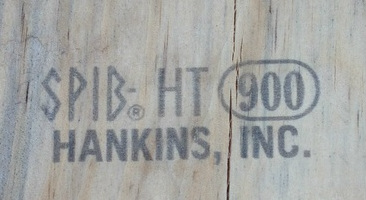
When using pallets for anything that will involve edibles coming in contact with it, make sure that you use heat treated pallets rather than chemically treated pallets. These pallets will be stamped with a HT somewhere on the pallet like this.
When using pallets for anything that will involve edibles coming in contact with it, make sure that you use heat treated pallets rather than chemically treated pallets. These pallets will be stamped with a HT somewhere on the pallet like this.
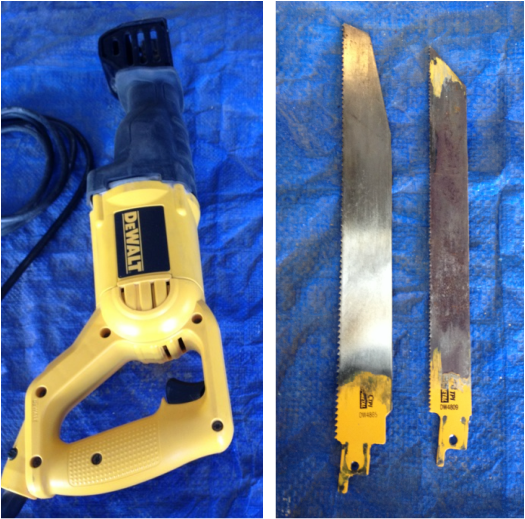
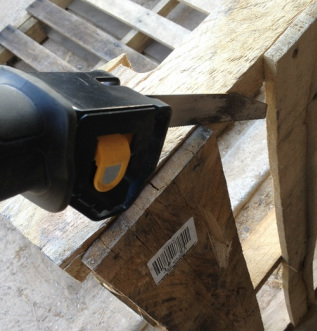
When disassembling the pallets, using a hammer to bang and pry the pallet apart will most likely end up with you frustrated, nails embedded in the boards without heads, and a pile of broken pallet wood. The easiest way to take them apart is to use a reciprocating saw with a good 12″ demolition, combination, or metal blade. A cheap saw from Harbor Freight or Amazon will get the job done, especially if you don’t plan to use it for more than a few simple projects. Here is a picture of my reciprocating saw. I use mine very frequently so I sprung for a little higher end model that will hold up to heavy use over the long term. The blade on the left is a Fire/Rescue demolition blade. I like using these because they are really tough and hold up well to abuse. The blade on the right is a standard metal cutting blade.
You simply place the blade between the pallet wood and the cross-member and cut the nail in half. This will leave a piece of the nail in one piece of the wood and the nail head and a piece of the nail and a nailhead in the other. The great thing about this is that it gives some great character to the wood when finishing it.
The bad thing is that it can present problems when you try to plane or sand the wood for any reason. If you are going to be doing either of those things you will probably want to remove the nails. To remove the portion from the pallet boards you can use a nail punch to punch them from the backside after cutting them. To remove them from the runner is much more difficult if you cut them, but if you attempt to pull them you will most likely damage the pallet board so you have to weigh your options.
If you are attempting to remove the nails from the runners, I have found that the easiest way is with pliers rather than a claw hammer or a pry bar as the nail heads usually pop off before the nail comes out. I prefer to use channel lock pliers as it doesn’t require as much work to hold on to the nail.
When sanding, remember that the more you sand, the more character you will take out of the wood. Depending on the project and how rustic you want the final finish to be will determine how much you will need to sand. Always start sanding with the lowest number grit and work your way up. Anything below 100 grit is very rough and will remove a lot of material, while 100-180 is generally consider medium grits and will begin refining the wood the higher grit you go. 180 and above is usually for finish sanding and will continue to refine the wood and will give you a very smooth finish. On the pallet table I built, I only used a 100 grit sand paper and only enough to remove the roughest areas to reduce splinters because I wanted the maximum character of the wood to remain.
Finishes on your wood will depend on the type of project you are doing but some of the options include :
- Polyurethane
- Teak Oil
- Oil based paint
- Water based paint
I hope you find some of these tips helpful in your pallet projects. Feel free to share them here. We would love to see them. Have a great day and God bless!
Like what you see? Please share with your friends and the whole world...


