


- Three 4′ sections of 3″ or 4″ PVC
- Three end caps
- One T
- A little piece of chain
- An eye bolt with two washer and two nuts
- A 1″ PVC plug
- Some metal pipe strapping
- PVC pipe cleaner (the purple stuff)
- PVC pipe glue
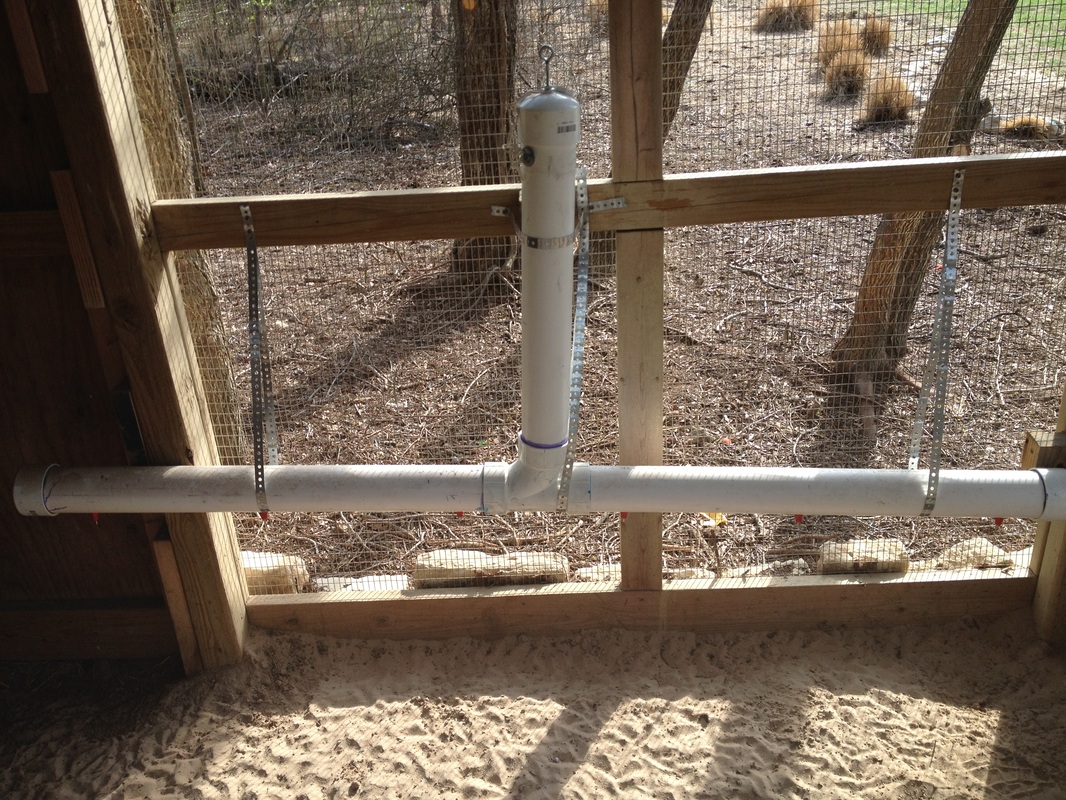
That’s it. For the main body assembly simple glue a 4′ section of PVC pipe into each side of the T. Then glue end caps on the two ends. The third cap will be left loose on the top for removing to fill the waterer. Allow everything to sit the recommended time on the PVC glue label. You can then draw a line down the center of the bottom of the waterer. Decide how many nipples you want on your waterer. I chose to put three on each side of the T. This has been more than sufficient for our flock of 7 and I feel confident that it will serve our flock as we add our chicks. The great thing is that I can add another as needed later or even cut off an end cap, glue in another T, and keep adding more vertical and horizontal pieces as needed. As it currently sits, the waterer holds about 3-1/2 gallons of water. My package insert that came with the nipples stated the drill bit size I would need to be able to screw the nipples into the pipe and achieve a water tight seal.
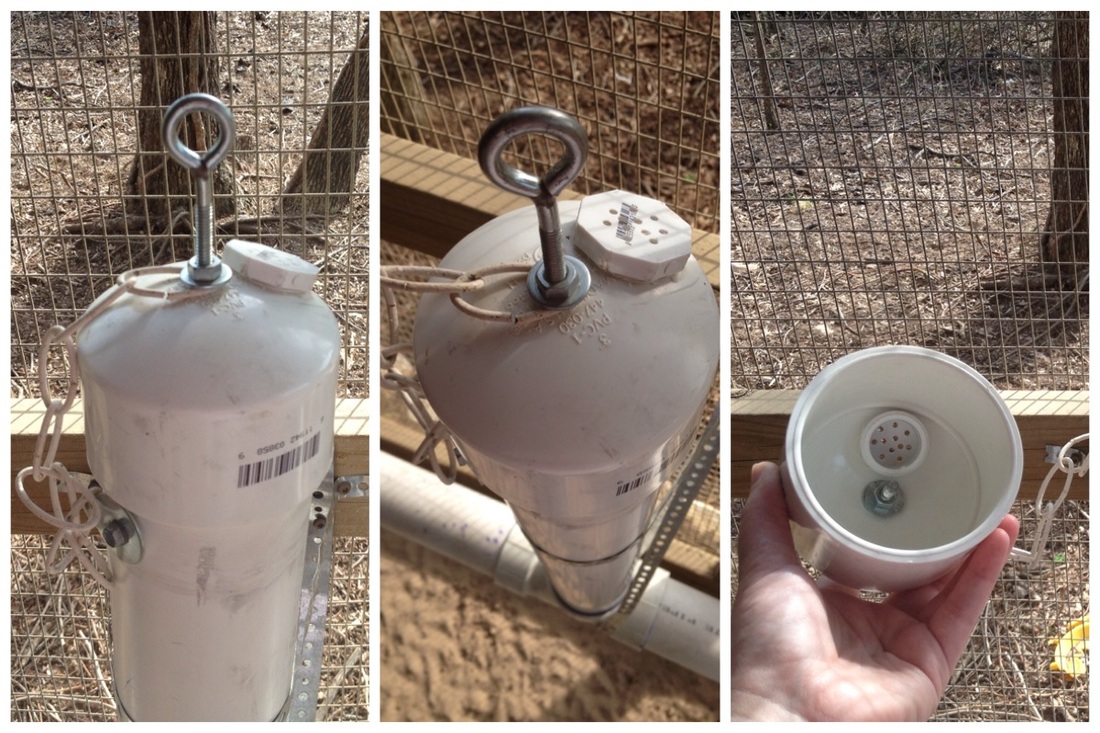
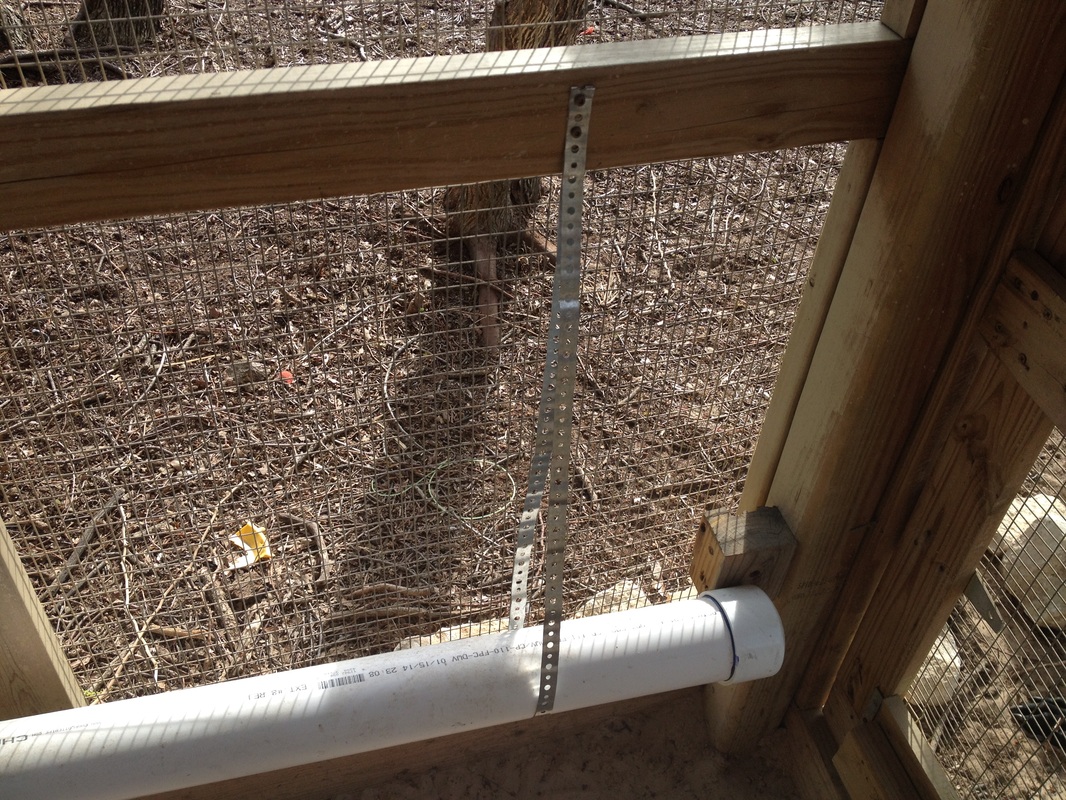
Here you can see how I hung the waterer. I figured up the height based off of my tallest chicken. I created a step area under a part of the waterer for the shorter birds to reach. I then just cut a piece of strapping to the appropriate length and screwed it into a 2″ x 4″ on the inside of the coop. The straps are rated for 200 lbs so one at each end is sufficient to hold the weight of the waterer. However, I’m an over achiever and placed an extra strap in the middle to just take weight off the joint in the middle. I then placed a small strap around the vertical piece to keep the waterer tight to the wall. Be careful with the strapping as it has very sharp edges. I recommend wearing leather gloves while working with it. I usually do but I did not the day I hung the waterer. That decision resulted in several cuts to my hands. My coop has shifted on my sandy soil and is not level so I used a level when hanging the waterer to make sure it was level, hence the “lop-sided” look in this picture.

When it came time for the big chickens to drink out of the waterer they seemed to have no interest. So I tried the other tips I had seen from other sites. I tried showing them by tapping the nipples so they would drip water and draw their attention. It didn’t work. I tried removing their other waterer. That didn’t work. Finally, I just picked up each chicken, held their heads up to the waterer, tapped their beaks against the nipple, and let a drop or two of water drip onto their beaks. It worked like a charm. The chickens were drinking out of the waterer within 5 minutes of me leaving the coop. Old, dirty, poop covered waterer out; new, clean, fresh waterer in! With the current capacity of the waterer and the size of our flock, we add a 2 liter pitcher of water every 2-3 days and that’s it. One of the neat features of this waterer is that I can later add a larger reservoir. My intention is to later add a 55 gallon rainwater collection system and tie it in to the waterer with an inline filter and one of these handy gravity flow adaptors. And there are many other accessories including a heater, a remote additive system, and more, here.
Disclaimer: These nipples are not totally leak proof. Some people do experience some leakage on occasion from the rod itself. If you have a leak from around the actual unit at the pipe connection, then the device may not be seated tightly enough, or the proper size hole was not drilled, or the seal is damaged in some way. If this is the case you can use a small bead of silicone around the nipple/pipe connections. If the device is leaking from around the middle where the two parts attach, hand tighten the lower piece. This should stop the leak. If the device is leaking from the stainless steel rod itself, the waterer may be on a slight angle allowing the rod to not seat properly, or a small piece of debris may be caught inside. If leveling does not work, disassemble the device at the middle (you do not need to remove the entire device from the waterer). The nipple will come apart in two pieces and inside you will find the bottom stainless steel rod, a stainless steel ball, and the top stainless steel rod (or copper rod if you are using the heater accessory pack). You might want to place a bowl or something underneath the nipple when disassembling so that you don’t lose and of these tiny parts. Clean the inside well and reassemble. If you experience further leaking you might want to contact the manufacturer of the brand nipple you ordered. I have found that a couple of our nipples still leak a few drops on occasion (it is not excessive) so we plan to place a small plant underneath the waterer for the chickens to eat and the leaking nipples will catch the extra water.


